The Irresistible Allure of Red Velvet Cookies
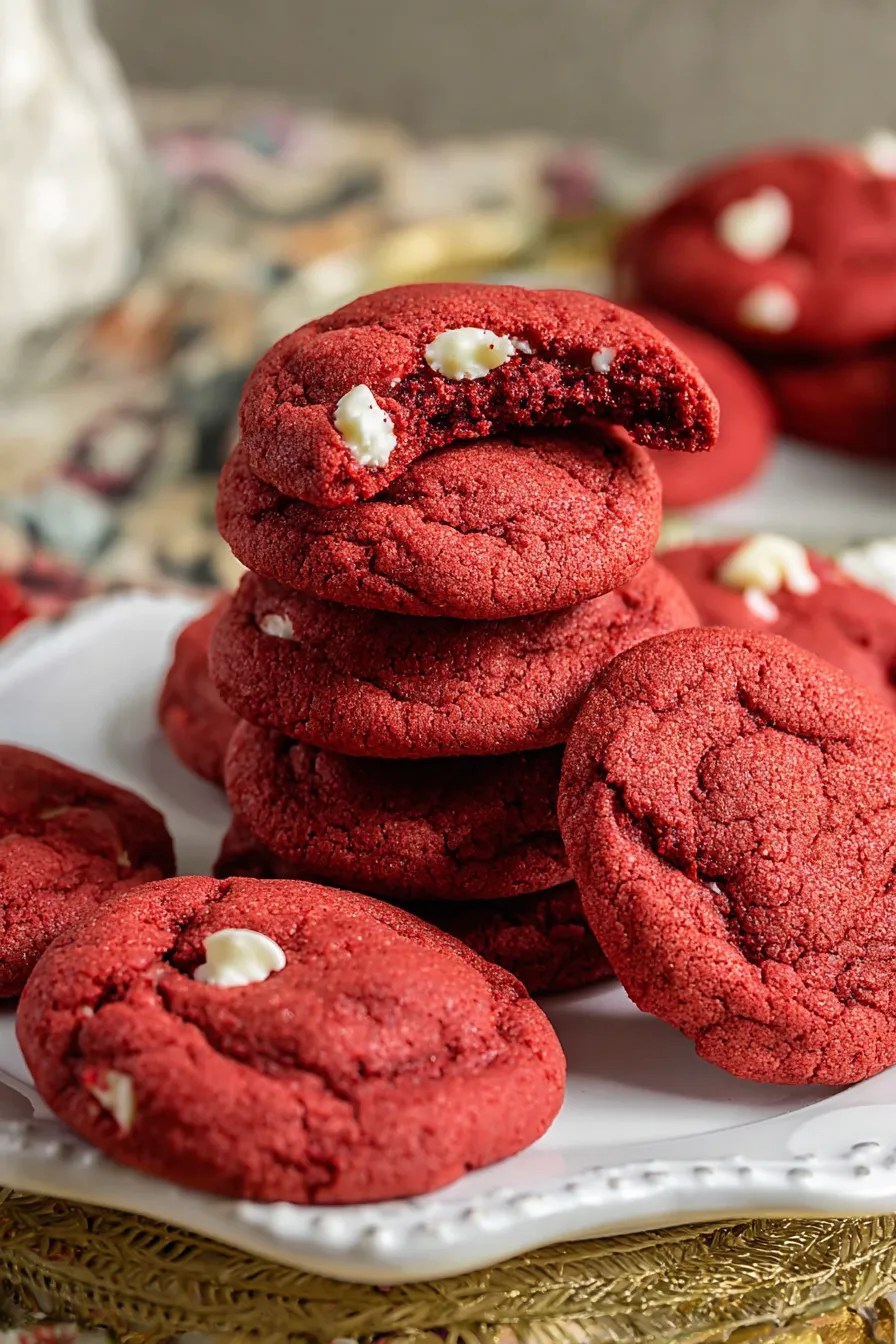
There's something undeniably magical about red velvet. It's a flavor profile that evokes comfort, elegance, and a touch of celebratory decadence. While red velvet cake often takes center stage, its more portable, bite-sized cousin – the red velvet cookie – holds a special place in the hearts of many dessert enthusiasts. Imagine: a cookie with a vibrant crimson hue, a delicate crispness at the edges, and a wonderfully soft, chewy center, delivering that signature cocoa-vanilla tang in every bite. It’s a treat for both the eyes and the palate, capable of transforming any ordinary moment into something extraordinary. This comprehensive guide will unlock the secrets to mastering these captivating cookies, ensuring you achieve perfect color, tang, and texture every time.
Decoding the Signature Red Velvet Flavor Profile
To truly master red velvet cookies, we must first understand what makes "red velvet" unique. It's far more than just a striking color; it’s a harmonious symphony of ingredients working in concert to create a distinct and beloved flavor. This balance is what elevates a good cookie to a truly spectacular one.
The Role of Cocoa and Acidity
- Subtle Cocoa Depth: Traditionally, red velvet recipes use a small amount of unsweetened cocoa powder. The goal isn't an intensely chocolatey flavor, but rather a subtle depth that complements the other elements without overwhelming them. It's the quiet backbone that gives the cookie character.
- The Tang from Acid: A critical component of red velvet's identity is its signature tang. This comes primarily from acidic ingredients like buttermilk and vinegar. Buttermilk, a tangy dairy staple, doesn't just tenderize the dough, leading to a softer cookie; its acidity interacts with the cocoa powder and also cuts through the sweetness, providing that delightful counterpoint that defines red velvet. If you often find yourself without buttermilk on hand, don't despair! Modern recipes have found clever ways to replicate this tang without it, making these cookies more accessible than ever. For innovative methods to achieve this without the traditional ingredient, explore options like those discussed in our article, Authentic Red Velvet Cookies: Buttermilk-Free & White Chocolate.
- Historical Color Connection: Historically, the reaction between acidic ingredients (like buttermilk and vinegar) and the natural anthocyanin flavonoids in cocoa powder contributed to a reddish-brown hue. While modern recipes often rely on food coloring for vibrancy, this traditional interaction still subtly influences the overall profile.
Achieving the Vibrant Crimson Hue
The vibrant crimson color is arguably the most visually striking aspect of red velvet cookies. Achieving that perfect, captivating shade requires a careful hand and understanding of your ingredients.
- Food Coloring is Key: For a truly rich, deep red, food coloring is essential. Gel food coloring is often preferred over liquid for its concentrated pigment, allowing you to achieve a vivid color without adding excess moisture to your dough. Start with a moderate amount and gradually add more until you reach your desired shade. Remember, the color will deepen slightly during baking.
- Cocoa's Influence: While food coloring provides the primary hue, the cocoa powder plays a vital supporting role. It adds a darker base that helps the red appear richer and less artificial, contributing to that luxurious, deep crimson rather than a bright, almost neon red.
- Balance is Beautiful: The goal is a visually stunning color that looks appetizing, not artificial. Avoid overdoing the coloring to the point where it becomes overwhelming. The color should invite, not alarm!
Mastering the Perfect Red Velvet Cookie Texture
Beyond color and flavor, the texture of a red velvet cookie is paramount. We're aiming for that heavenly combination of slightly crispy edges yielding to a wonderfully soft and chewy center. This isn't achieved by accident; it's the result of precise technique and timing.
The Delicate Balance: Crispy Edges, Chewy Center
The secret to this coveted texture lies in a few key factors:
- Ingredient Ratios: The balance of butter, sugar, and flour is crucial. Sufficient fat contributes to tenderness and spread, while the right amount of sugar helps create those coveted crispy edges as it caramelizes during baking.
- Proper Mixing: Creaming butter and sugar until light and fluffy incorporates air, which contributes to the cookies' lift and tender crumb. However, be careful not to overmix once the flour is added, as this can develop too much gluten, resulting in tough, dry cookies.
- Critical Baking Time: This is perhaps the most vital step. The difference between a perfect chewy cookie and a hard, dry one can be just a minute or two in the oven. You want to pull your red velvet cookies from the oven when the edges are just set and lightly golden (though the red color might mask the 'golden' aspect), but the centers still look slightly soft and underbaked. They will continue to cook and set on the hot baking sheet as they cool. Trust your instincts and resist the urge to overbake!
The Magic of No Chilling
One of the most appealing aspects of certain red velvet cookie recipes is the lack of chilling time. This convenience makes them a perfect solution for spontaneous cravings or when unexpected guests arrive, allowing you to go from mixing bowl to warm cookies in under 30 minutes. Recipes designed for no-chill typically have a specific balance of ingredients that prevents excessive spreading, maintaining their shape without needing refrigeration to solidify the fats. This streamlines the baking process without compromising on quality, proving that you can have both speed and deliciousness. For recipes specifically designed for instant gratification, check out our guide on Quick Red Velvet Cookies: No Chilling, Under 30 Minutes.
Elevating Your Red Velvet Cookies: Ingredients & Add-ins
While the core components create a fantastic cookie, certain additions can elevate your red velvet cookies from delicious to absolutely unforgettable.
The Unbeatable Combination: White Chocolate Chips
Ask almost any red velvet aficionado, and they'll likely agree: white chocolate chips and red velvet are a match made in heaven. Folding generous amounts of white chocolate chips into your dough adds several layers of delight:
- Sweetness and Creaminess: White chocolate provides an extra layer of sweetness and a rich, creamy texture that melts beautifully into the chewy cookie.
- Textural Contrast: The soft pockets of melted white chocolate offer a delightful contrast to the cookie's tender crumb.
- Visual Appeal: The stark white against the vibrant red creates a stunning visual appeal, making each cookie even more enticing.
Beyond the Basics: Vanilla and Other Enhancements
Don't underestimate the power of high-quality vanilla extract. It's a key flavor enhancer that ties all the elements of red velvet together. Beyond white chocolate, consider these additions for an extra flourish:
- Cream Cheese Drizzle: A simple drizzle of cream cheese frosting (made with cream cheese, powdered sugar, butter, and a splash of vanilla) can take your cookies to the next level, echoing the traditional red velvet cake pairing.
- Chopped Nuts: A small amount of finely chopped pecans or walnuts can add a subtle crunch and earthy flavor that complements the red velvet profile.
- Alternative Chocolate: While white chocolate is classic, don't hesitate to experiment with milk chocolate or even dark chocolate chips for a different flavor dynamic.
Baking Red Velvet Cookies Like a Pro: Essential Tips
To ensure your red velvet cookies turn out perfectly every time, keep these professional tips in mind:
- Room Temperature Ingredients: Always start with room temperature butter and eggs. This allows them to emulsify properly, creating a smoother dough and a more consistent texture.
- Measure Accurately: Baking is a science. Use a kitchen scale for flour and cocoa powder for the most precise measurements, especially. Too much flour can lead to dry, crumbly cookies.
- Don't Overmix: As mentioned, overmixing after adding flour develops gluten, resulting in tough cookies. Mix only until the ingredients are just combined.
- Consistent Portioning: Use a cookie scoop to ensure all your cookies are roughly the same size. This guarantees even baking and a uniform appearance.
- Parchment Paper is Your Friend: Line your baking sheets with parchment paper or silicone mats. This prevents sticking, promotes even browning, and makes cleanup a breeze.
- Listen to Your Oven: Every oven is different. Pay attention to your cookies, not just the timer. Look for the visual cues of set edges and slightly soft centers.
- Cool Properly: Let the cookies rest on the baking sheet for 5-10 minutes after removing them from the oven. This allows them to firm up without breaking. Then, transfer them to a wire rack to cool completely.
Mastering red velvet cookies is a delightful journey that combines a bit of science with a lot of love. By understanding the interplay of cocoa, acidity, and texture, and by applying these practical tips, you can consistently bake cookies that are not only visually stunning but also deliver an unforgettable taste experience. So go ahead, embrace the crimson magic, and bake your way to perfect red velvet bliss!
